Wood Stove Installation Guide
Introduction
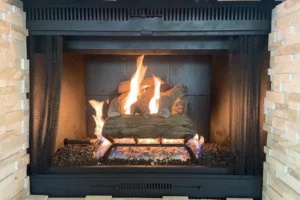
Installing a wood stove in your home can significantly enhance comfort and energy efficiency. Here’s a step-by-step guide to help you through the process, ensuring safety and functionality.
1. Choosing the Right Stove
– Size & Capacity: Ensure the stove fits your space and heating needs.
– Efficiency Ratings: Look for EPA-certified models for optimal performance.
Other options you might consider:
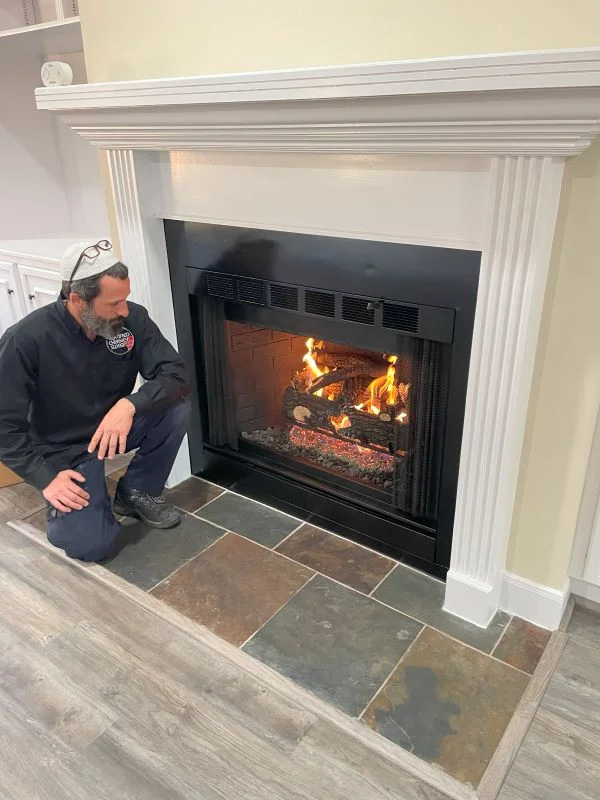
2. Location and Placement
– Clearances: Maintain proper distances from walls and combustible materials.
– Floor Protection: Use a non-combustible hearth pad.
When placing a fireplace, ensure it is installed in a central location to maximize heat distribution. Keep the area accessible and follow local codes for proper ventilation.
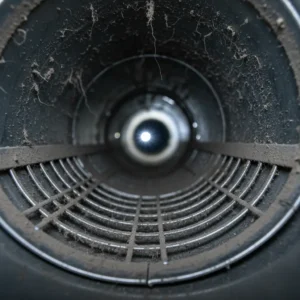
3. Ventilation and Chimney Setup
– Chimney Type: Use a masonry chimney or Class A chimney with a stainless steel liner.
– Draft Requirements: Ensure proper chimney height and draft as specified by the stove manufacturer.
– Permits and Inspections: Always schedule a certified chimney inspection before use.
– Connecting the Chimney: Secure joints and seal connections to prevent leaks.
– Connecting the Chimney: Properly secure the chimney sections and check for leaks.
- Chimney Type: Use a Class A chimney or masonry chimney with a stainless steel liner for durability and safety.
- Chimney Height: Ensure the chimney extends at least 3 feet above the roof and 2 feet higher than any structure within 10 feet to ensure proper draft.
- Draft Requirements: Follow the stove manufacturer’s specifications for chimney height and draft to optimize performance and safety.
- Chimney Placement: Position the chimney as close to the center of the house as possible to improve draft and minimize potential downdrafts.
- Ventilation: Ensure the room has adequate ventilation to supply the wood stove with enough air for efficient combustion.
- Flue Size: Match the flue size to the stove’s exhaust size to ensure proper draft and efficient operation.
- Chimney Cap: Install a chimney cap to keep out rain, animals, and debris.
- Regular Maintenance: Schedule chimney repair or chimney relining if needed.
- Sealing Joints: Ensure all chimney joints are properly sealed to prevent leaks and enhance efficiency.
- Combustion Air Supply: Consider installing an external air supply to provide the stove with a dedicated source of combustion air, improving efficiency and safety.
4. Safety Measures
– Smoke and Carbon Monoxide Detectors: Install near the stove.
– Fire Extinguishers: Keep accessible in case of emergencies.
Points to consider
- Smoke and Carbon Monoxide Detectors:
- Fire Extinguishers
- Proper Clearances
- Non-Combustible Hearth Pad
- Secure Installation
- Ventilation
- Educate Family Members: Make sure everyone in the household knows how to operate the stove safely and what to do in case of an emergency.
5. Maintenance Tips
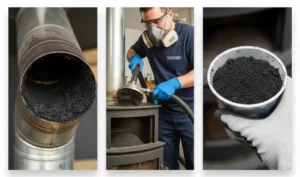
– Regular Cleaning: Book annual chimney services to remove creosote and maintain efficiency.
– Ash Disposal: Always use a metal container for storing and disposing of ashes.
– Inspection: Plan yearly level 1 or level 2 chimney inspections, depending on usage.
Conclusion
Proper installation and ongoing chimney maintenance will ensure your wood stove provides warmth and efficiency for years to come. Always follow manufacturer instructions and professional guidance for the safest results.
Your Local Wood Stove Experts
Choosing and installing a wood stove is a significant home improvement that requires professional expertise. Contact our team at Texas Chimney LLC to ensure a safe, efficient, and code-compliant installation for your home.